Whitebrush Manor - Porch Update
I'm still dealing with some headaches from the crash a few weeks ago, but they seem to be coming a little less frequently. This has given me some time (and motivation!) to continue working on my dollhouses.
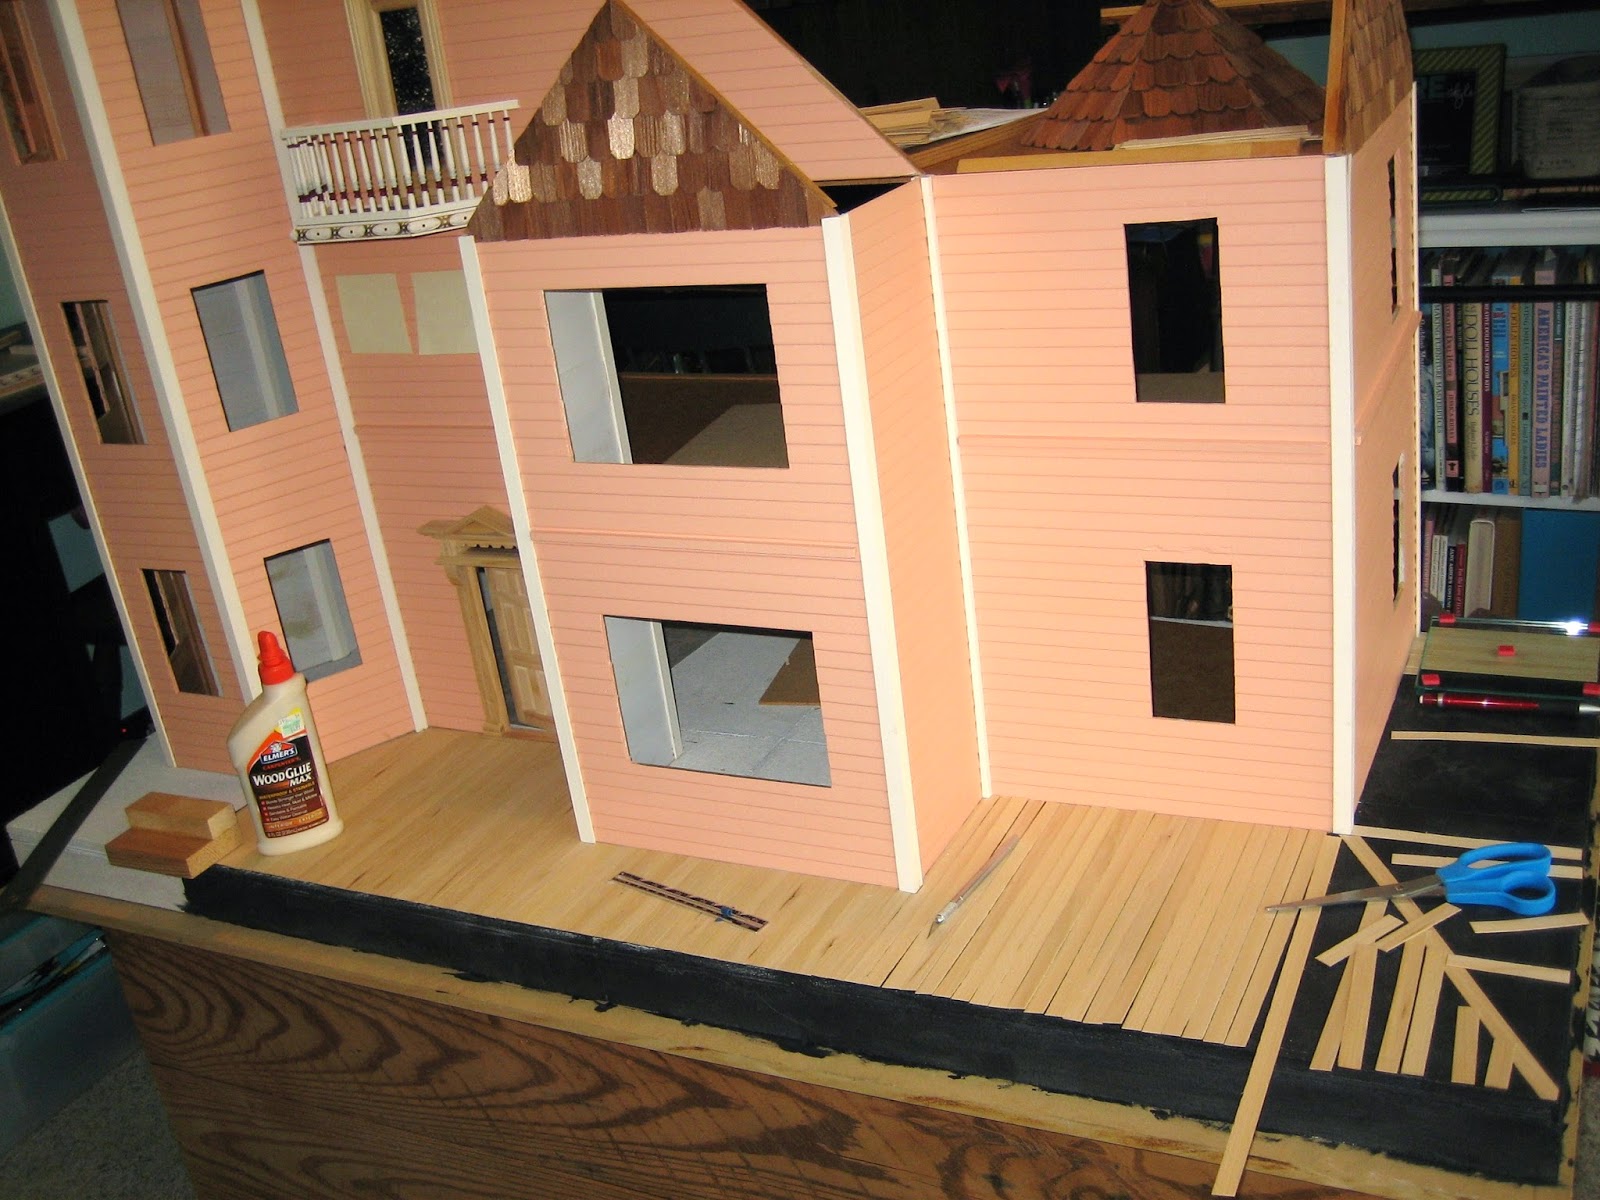
Last weekend I started planking the porch. I used the hardwood floor strips that came with the Dura-Craft kit, and was really pleased with them.
The first step was to paint the area under the flooring so that if there were any gaps (there were), they'd be much less noticeable. Then I started cutting the flooring to fit and gluing it down.
 I did some research on this link (sort of a Pinterest for home renovation and decor) and found a few porches I liked that had the flooring laid out like this around the corners.
 I love the knot holes in some of the planks, and used them as much as I could to add even more character.
 The front entry is beginning to come together.
 Next up was getting the stain down and adding a couple of coats of Tung oil. I just used one coat of matte oil and followed that with one coat of the glossy. Since it's a porch, I didn't think it should be too shiny.
 I had already painted the base finishing strips for the bottom of the house, so once the stain was dry I brought everything back in from the garage and glued the house on. Those strips came next. I really like the way they've finished off the base of the house.
 Since I was on a roll, I figured I might as well start gluing on the porch railings and the porch roof support.
 If you look closely at the picture above, you can see the teensy little hooks I've added to the porch roof support. Those will be for hanging baskets with all sorts of flowers. I'm planning on making a bunch of different arrangements to change with the seasons (because I'm obsessed like that).
I did a dry-fit of the porch roof, and cut the notches so that the roof fits snugly against the side of the house.
 The weird thing was that the section of roofing in front of the bay windows was lower than it should be.
 And this is why you should ALWAYS dry-fit your house parts before gluing them down. I thought maybe I'd made a mistake gluing the support on to the wall, but I double-checked the instructions and I'd done just as they said. Strange.
Luckily, I have a ton of trim left over from construction, and I found this piece that I stuck up there to try and level it off.
 And voila! I couldn't have planned a better match if I'd tried.
 It is just amazing how quickly it seems to be coming together now that I've got all the fiddly little parts painted.
One thing that hasn't been my favorite part, however, are the windows I decided to add to the front of the house under the balcony. The intention is to add light to the bathroom as I explained in this post. These are the windows going in, and I like the way they'll give another view into the house.
 I carefully measured and marked where I wanted them to go.
 I decided little dots weren't enough to keep me between the lines, so... I drew lines (they weren't as blurry in real life).
 This was the part that terrified me--the actual drilling of holes into my beautiful mansion. <gasp!> However, I did manage to do it without screwing anything up. Good thing, too, because there was no going back once I started.
 I used my X-acto knife to saw/cut/carve the first square out. Man, that was a job! I hate to admit it, but I think I'm going to have to actually spring for that Dremel now.
 It took forever. Like at least an hour forever, for only a 2" square window opening. I don't know when I'll actually get the Dremel though, because August seems to be the "pay for everything RIGHT NOW" month. I still need to shingle the porch so it's not like I don't have lots of things to keep me busy until I can afford it.
But, back to the one finished window. Here it is set into place. It looks so great!
 I have absolutely had the best time during the process of building this house. One of my favorite parts, though, is finding things that I think Rose would like to have.
I found the most adorable little metal "wicker" set for the porch on Etsy. It totally looks like something I could see her buying in real life.
 She will love spending mornings here with a cup of tea after the girls are off to school.
The first step was to paint the area under the flooring so that if there were any gaps (there were), they'd be much less noticeable. Then I started cutting the flooring to fit and gluing it down.
I did a dry-fit of the porch roof, and cut the notches so that the roof fits snugly against the side of the house.
Luckily, I have a ton of trim left over from construction, and I found this piece that I stuck up there to try and level it off.
One thing that hasn't been my favorite part, however, are the windows I decided to add to the front of the house under the balcony. The intention is to add light to the bathroom as I explained in this post. These are the windows going in, and I like the way they'll give another view into the house.
But, back to the one finished window. Here it is set into place. It looks so great!
I found the most adorable little metal "wicker" set for the porch on Etsy. It totally looks like something I could see her buying in real life.


Comments
Post a Comment