Whitebrush Manor - Balcony, Window and Flooring Upgrades
Lots to talk about today!
We'll start with a plan I've come up with for the flooring. I found this flooring to go in the tower, probably to be installed on the top floor. I've cut a template from a paper towel to be sure it would fit, and it's going to be perfect.
 The gap in the floor panels will be covered by the flooring, and from what I understand it's a pretty common feature of the Dura-Craft kits anyway. The starburst design will be stunning here.
I have also purchased hardwood flooring to go in every room in the house. I've decided I'm going to cut some of it into a herringbone pattern (similar to this floor) in one of the rooms. Maybe a checkerboard stain pattern in the kitchen, and probably at least one other room with some sort of parquet flooring.
The porch will also be planked. It will be stained, most likely a walnut color (my favorite so far) and finished with a high gloss Tung oil.
Now, for the balcony.
The kit came with plain dowels for the spindles on both the porch and the balcony, and a weird U shaped banister piece.
 Borrrrring! This is a Victorian so it needs to be tricked up in order to fit the ornate qualities of the period.
Voila!

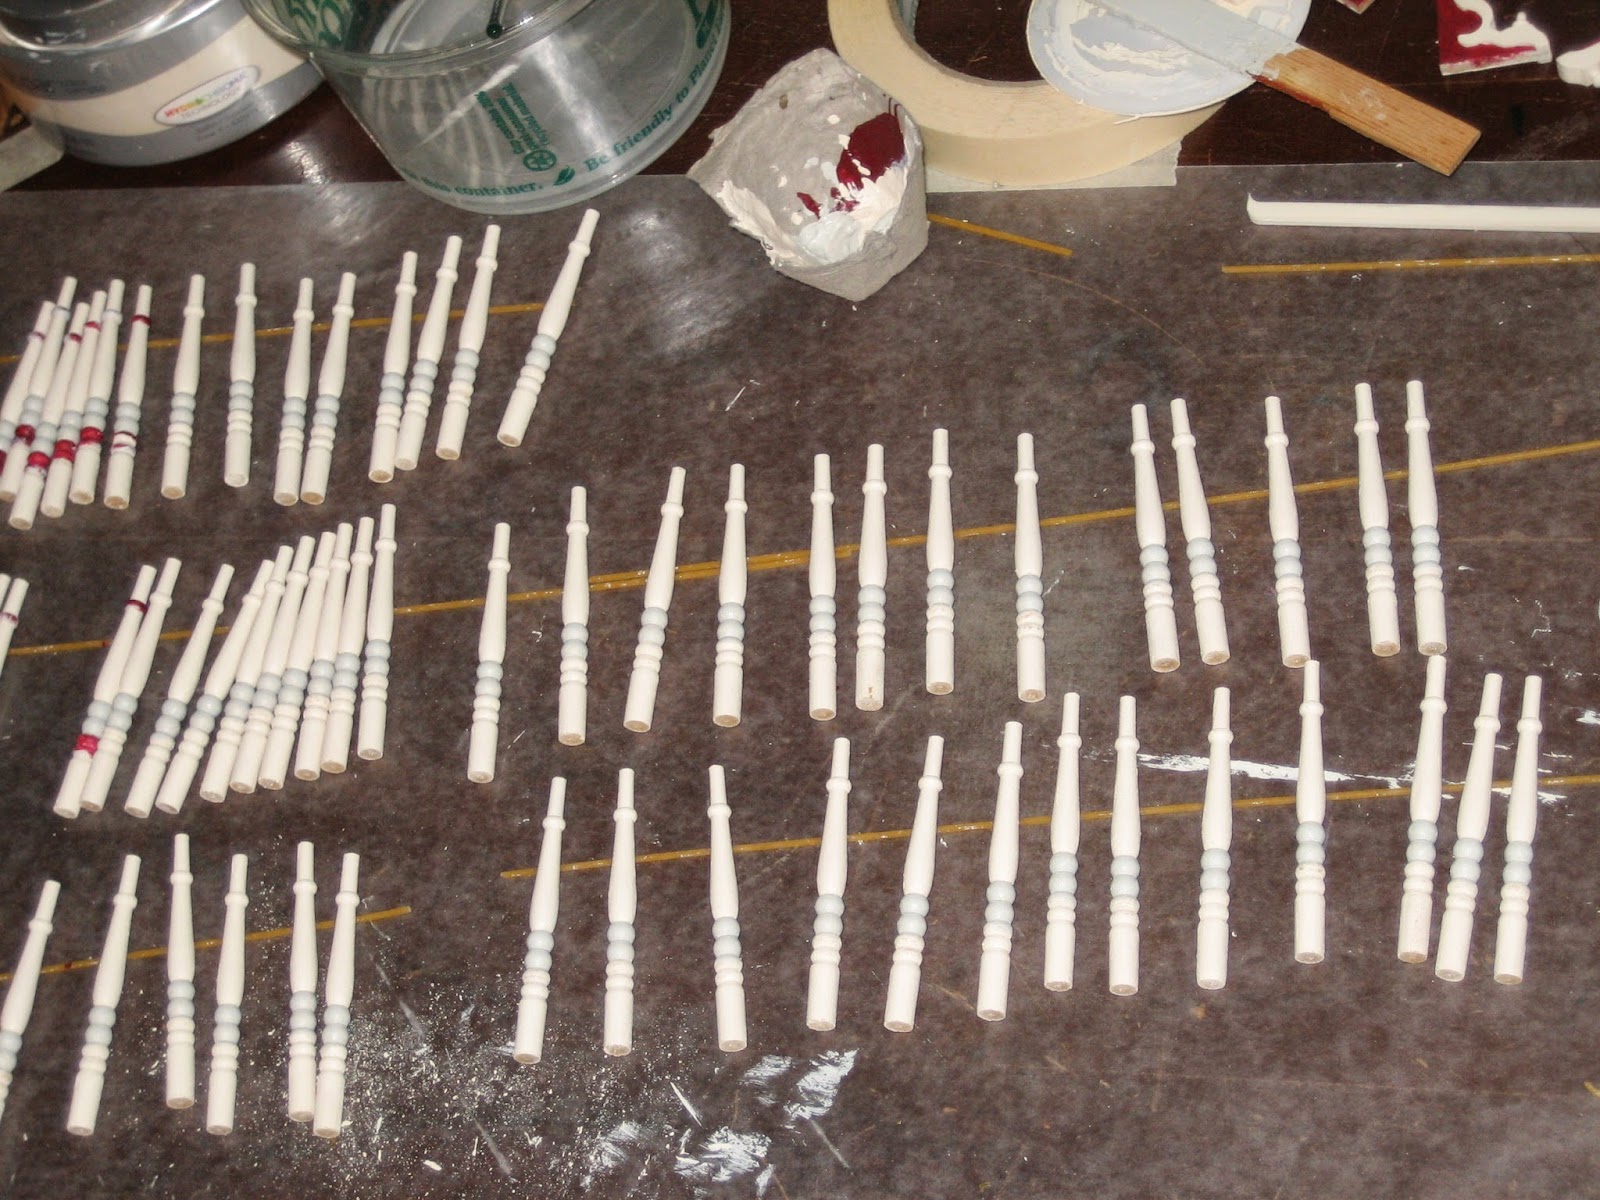
Here are the spindles I've chosen for the balcony, after being sanded and given two coats of white paint. I've already applied the grey color to the top two bubble thingees in the picture above.
I painted the bottom two the garnet color.
 And though I don't have a picture of the spindles after I painted the top single bubble thingee, I can show you pictures of the balcony railings all assembled. Somehow I wound up with two extra balcony spindles because I only needed 24. What can I say? Math has never been my strong suit.
 I used dry spaghetti under the top piece of railing after I glued it on to keep it from sagging and drying crooked due to the narrow top edge of the railing wanting to droop onto the table.
I had some chevron-type hardwood flooring sheets that I got from Through the Keyhole before they went out of business. It was scrap material, but I had just enough to cover the balcony. I went ahead and stained it lightly with my walnut stain, and I'm toying with the idea of adding another coat before putting the Tung oil on it. I feel like it may be too light.
When I glued on the floor support piece to the balcony flooring, it was either warped or just off slightly enough to not allow the floor to fit snugly against the side of the house (can you see the gap?).
 I remedied this by adding a strip of balsa to the back and clamping it until it dried. After that was done, I painted the bottom the same color as the house so that (hopefully) it will blend in when you're looking up at the underneath side.
 Now it fits snug against the siding of the house and will glue on much easier.

This is the balcony with the railings set on top (not glued yet). I'm working on some strip trim to cover up the ugly edges of the balcony flooring though I'm having some technical difficulties involving a gold paint pen. As soon as I get those worked out, I will upload pictures of it too.
 And another view:
 I'm really excited. I think it's going to look fabulous when it's all attached.
I have also played around with the wall placement to get a feel for each of the rooms. I am keeping the layout pretty much the same as the kit directions.
Here is the inside of the house (walls not glued in yet, so don't panic that they're crooked):
 Of course the flash was on in this picture so you can't tell how dark the bathroom is (second level, small, window-less room to the right of the stairs), but trust me. It is dark!
I was whining to myself about how dreary it would be even with lights installed, especially since I'd found so many fabulous bathrooms on houzz.com that I just loved (like this one or this one). The common denominator of both rooms is... you guessed it... natural light.
So I have decided to add these windows. Two will go in the bathroom, and to even out the look on the front I'll also put one in Rose's bedroom. I cut sticky notes to the size of the windows and measured from the ground floor for front and back placement.
Here they are from inside the house:
 And from outside:
 Even though the balcony isn't in yet, I think the placement will be okay. If necessary, I still have room that allows me to set them a little lower without looking weird. I haven't yet decided if I'm going to do stained "glass" panes in the windows, or just bright and airy curtains.
The windows should be in tomorrow, along with the dormer that I'll be adding to Sylvia's bedroom on the third floor. I'm eagerly anticipating the arrival of furniture from eBay and all the wallpaper I've ordered too, and as soon as it's all here I'll do another post to show everything.
For now, I have begun painting all 71 (!!) porch spindles. Oy.
 This will probably keep me busy for a while. :)
We'll start with a plan I've come up with for the flooring. I found this flooring to go in the tower, probably to be installed on the top floor. I've cut a template from a paper towel to be sure it would fit, and it's going to be perfect.
I have also purchased hardwood flooring to go in every room in the house. I've decided I'm going to cut some of it into a herringbone pattern (similar to this floor) in one of the rooms. Maybe a checkerboard stain pattern in the kitchen, and probably at least one other room with some sort of parquet flooring.
The porch will also be planked. It will be stained, most likely a walnut color (my favorite so far) and finished with a high gloss Tung oil.
Now, for the balcony.
The kit came with plain dowels for the spindles on both the porch and the balcony, and a weird U shaped banister piece.
Voila!
Here are the spindles I've chosen for the balcony, after being sanded and given two coats of white paint. I've already applied the grey color to the top two bubble thingees in the picture above.
I painted the bottom two the garnet color.
I had some chevron-type hardwood flooring sheets that I got from Through the Keyhole before they went out of business. It was scrap material, but I had just enough to cover the balcony. I went ahead and stained it lightly with my walnut stain, and I'm toying with the idea of adding another coat before putting the Tung oil on it. I feel like it may be too light.
When I glued on the floor support piece to the balcony flooring, it was either warped or just off slightly enough to not allow the floor to fit snugly against the side of the house (can you see the gap?).
This is the balcony with the railings set on top (not glued yet). I'm working on some strip trim to cover up the ugly edges of the balcony flooring though I'm having some technical difficulties involving a gold paint pen. As soon as I get those worked out, I will upload pictures of it too.
I have also played around with the wall placement to get a feel for each of the rooms. I am keeping the layout pretty much the same as the kit directions.
Here is the inside of the house (walls not glued in yet, so don't panic that they're crooked):
I was whining to myself about how dreary it would be even with lights installed, especially since I'd found so many fabulous bathrooms on houzz.com that I just loved (like this one or this one). The common denominator of both rooms is... you guessed it... natural light.
So I have decided to add these windows. Two will go in the bathroom, and to even out the look on the front I'll also put one in Rose's bedroom. I cut sticky notes to the size of the windows and measured from the ground floor for front and back placement.
Here they are from inside the house:
The windows should be in tomorrow, along with the dormer that I'll be adding to Sylvia's bedroom on the third floor. I'm eagerly anticipating the arrival of furniture from eBay and all the wallpaper I've ordered too, and as soon as it's all here I'll do another post to show everything.
For now, I have begun painting all 71 (!!) porch spindles. Oy.


Comments
Post a Comment